A CustomerHub page is a web page that can be linked to the navigation menu in the member / customer portal. A page can be part of the top-level navigation, or can be added as a sub-menu option under one of the main menu options.
Access to a page is defined by a visitor 's active Infusionsoft Subscriptions, Tags, or the membership group you assign to the page when you create it.
A Page layout includes a main body area and a right side column. To create a page, you will enter text and merge in content (images, videos, audio, member files, or partials) from the Media Selector Tool.
Creating a page
- Go to the Pages
- Click on the Create Page button.
- To create a custom page, click the custom page type. There are other page types you can choose from: Video, Video Gallery, Image Gallery (🔎 Learn more about page types here.)
- Enter a Page Name. This name is displayed in the navigation menu, at the top of the web page, and as the page title in the Internet browser.
- Select the a page Type (Main or Sub-page.) Main pages are added as a top navigation tab. Sub-pages are shown as links below the tabs when the related main page is viewed.
- Choose who can view this page (you can come back and change this later.)
- Click the Save button to create the page.
Copying an existing page
- Go to Pages
- Click on an existing page
- Click the dropdown option on the Save button
- Select "Save & Copy"
- Give the new page a new name and click create.
- Once created you can edit and publish.
Note: When a new page is copied, a randomly generated ID is added to the permalinks name. This can be modified via the general info tab.
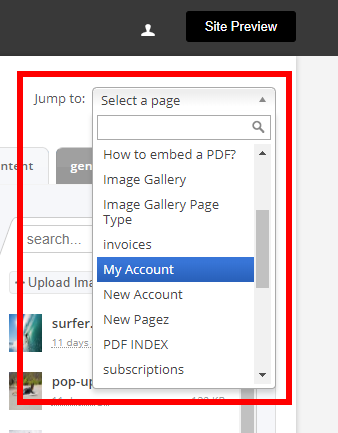
Quickly navigate to edit another page


Adding Content to a page
- Enter the page Content. In most cases, you will use the built in WYSIWYG editor to create page content. If you have the WYSIWYG editor disabled, go to Admin > Application Settings > WYSIWYG to enable it. Note: You can click on the HTML icon " < > " to paste HTML code into the editor instead of using the WYSIWYG tools.
- Use the Media Selector Tool to insert multimedia (images, videos, etc...) into the page. Click into the WYSIWYG editor where you want to insert a file. Click on a media tab, then click on the name of the file you wish to insert into the page.
- You can enter a filename into the Search field to find a file more quickly in larger media libraries. (Note: Be careful to not edit the merge code for the multimedia files or the files will not merge into the page properly)
- (Optional) New pages use the Default Right Column. This generally displays your company logo and any information you entered under Admin > Customize Theme tab. Click on the link to edit the Default Right Column or un-mark the checkbox to create a custom right column for this page.
- New pages are considered Drafts. You must click the Save & Publish button for the page to go live on your member website. Click Save to save this as a draft for now.
- Click on Site Preview to preview the page and test the access permissions.
General Info tab
- Name - specify what the page will be named and displays on the menu.
- Permalink - use this to get the full URL of your page. Note: You can have a different Permalink value then the page name. eg. Page name equals "Welcome Home" but the permalink is just "home". (https://yoursite.customerhub.net/home)
- Type - specify where this page will be located in relation to your sites navigation. (Main page menu or subpage)
- Navigation link visibility - indicates if your members can see the page in your sites navigation. Note: this setting takes precedence over page permissions.
Permissions tab
Who has access to this page?
- All Members (Public) - viewable by ALL registered members (still requires a log-in)
- Certain Members (Permissions) - specify a member group and/or additional tags / subscriptions. Typically used when you have paid content you want to restrict.


